Я буду использовать
Node.js
So if you have not installed
Node.js, then
install Node.js ...
как сделать самому вручную
План (12 шагов)
Step 1. Open Visual Studio Code
Если у вас не установлена
Visual Studio Code нужно
установить Visual Studio Code ...
Открываем
Visual Studio Code


Step 2. Create a new folder my_typescript_project1 on disk D: and in the Visual Studio Code select this folder
Создаем новую папку my_typescript_project1 на диске D: и
в Visual Studio Code нажимаем
File → Open Folder ...
и выбираем эту папку D:/my_typescript_project1

Step 3. Create a new file index.html inside Visual Studio Code

Добавим код в
Файл index.html
<!DOCTYPE html>
<html xmlns="http://www.w3.org/1999/xhtml">
<head>
<meta charset="utf-8" />
<title></title>
</head>
<body>
<!-- include js script -->
<script src="./build/my.js" ></script>
<!-- my script -->
<script>
var book = new Book();
alert(book.Name);
</script>
</body>
</html>
Save the file for this click File → Save

Step 4. In the terminal string, we execute npm init to create a file package.json
Let's open the terminal line:
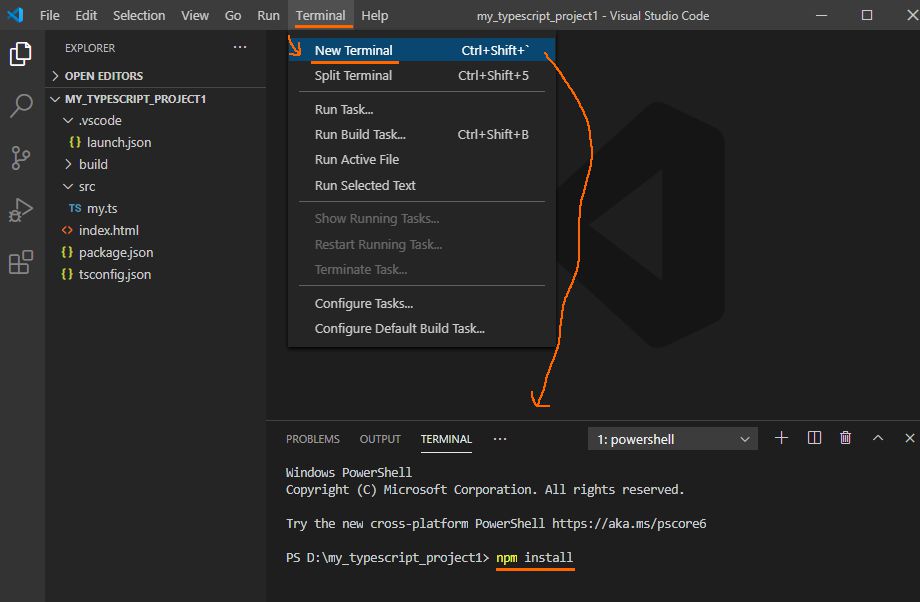
Click Terminal → New Terminal

Введем
Все время нажимаем кнопку
Enter
Читать:
что такое npm init ...

Результат: создался файл package.json
Добавим скрит MyBuild в файл package.json
Файл D:/my_typescript_project1/package.json
{
"name": "my_typescript_project1",
"version": "1.0.0",
"description": "",
"main": "index.js",
"scripts": {
"MyBuild": "tsc"
},
"author": "",
"license": "ISC",
"devDependencies": {
"typescript": "^3.9.7"
}
}
Скрипт
MyBuild будет запускать
tsc
tsc это программа TypeScript которая конвертирует
ts файл в
js файл
Запуск
tsc без параметров означает что настройки будут браться из файла
tsconfig.json
Читайте
подробнее о npm скриптах ...
Step 5. In the terminal string, we execute npm install --save-dev typescript to install the package TypeScript
Введем
npm install --save-dev typescript
Читать:
что такое npm install --save-dev имя_пакета ...

Step 6. Create a new file tsconfig.json inside Visual Studio Code для конвертации файла ts в файл js

Добавим код в
Файл tsconfig.json
{
"compilerOptions": {
"module": "commonjs",
"target": "es6",
"lib": ["es6"],
"sourceMap": true, // true means that will be generating debug information(map file). And you can debug application with breakpoints.
"outDir": "./build"
},
"exclude": [
"node_modules"
]
}
Save the file for this click File → Save
Step 7. Create a new file src/my.ts inside Visual Studio Code

Добавим код в
файл src/my.ts
class Book
{
public Name: string;
constructor()
{
this.Name = "Good book";
}
}
Save the file for this click File → Save
Step 8. Create a new file .vscode/launch.json inside Visual Studio Code

Добавим код в
Файл .vscode/launch.json
{
// Use IntelliSense to learn about possible attributes.
// Hover to view descriptions of existing attributes.
// For more information, visit: https://go.microsoft.com/fwlink/?linkid=830387
"version": "0.2.0",
"configurations": [
{
"type": "chrome",
"request": "launch",
"name": "Launch Chrome",
"url": "${workspaceFolder}/index.html"
}
]
}
Step 9. Compile the project (execute npm run MyBuild to convert a file ts in the js)

We'll see what's in the folder build a file was created my.js
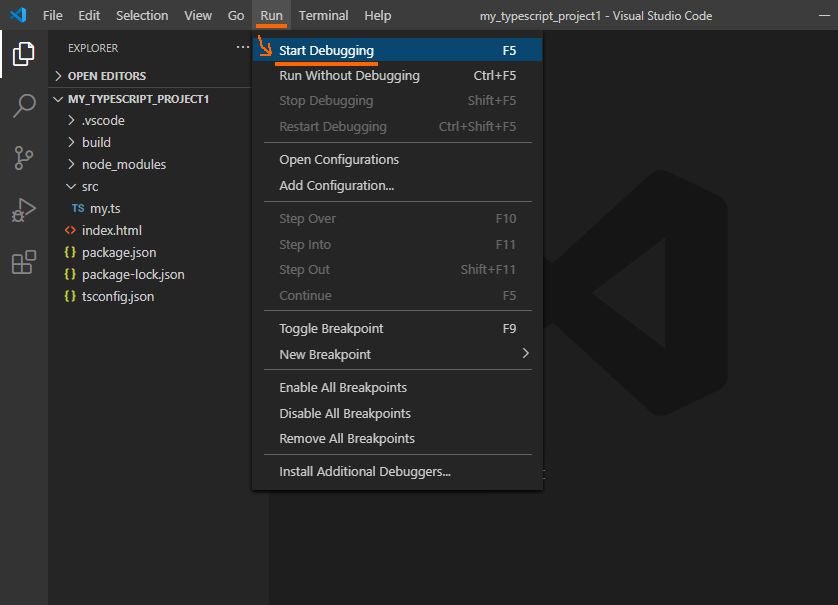
Шаг 10. Запускаем проект нажимаем Run → Start Debugging. Ошибка "Configured debug type 'chrome' is not supported"

Ошибка "Configured debug type 'chrome' is not supported"

Установим Chrome Debugger


Шаг 11. Запускаем проект в отладчике (для этого нажимаем Run → Start Debugging или клавиша F5)

На экране увидим результат:

Step 12. We set stopping points (Breakpoints)
Let's put breakpoints in the file index.js
Breakpoints are set by pressing a key F9

Run the program in the debugger (debug). Click Run → Run debugger или кнопку F5
The program is running and we can watch:
• WATCH (variable values)
• CALL STACK (function call stack)
• BREAKPOINTS (set, remove stopping points)

Note!
After keystroke F5 for the first time the debugger does not stop at a breakpoint (breakpoints).
The debugger goes to a breakpoint (breakpoints) when i click Restart


Download the example
 D:/my_typescript_project1
 index.html
package.json файл настройки Node.js (содержит названия пакетов)
tsconfig.json файл настройки TypeScript (путь куда конвертировать js файл)
.vscode
launch.json файл настройки для Visual Studio Code (путь к запускаемому файлу)
src
my.ts
build
my.js появится этот файл когда скомпилируем проект
index.html
package.json файл настройки Node.js (содержит названия пакетов)
tsconfig.json файл настройки TypeScript (путь куда конвертировать js файл)
.vscode
launch.json файл настройки для Visual Studio Code (путь к запускаемому файлу)
src
my.ts
build
my.js появится этот файл когда скомпилируем проект
Смотрим файлы
1)
Файл
index.html
<!DOCTYPE html>
<html xmlns="http://www.w3.org/1999/xhtml">
<head>
<meta charset="utf-8" />
<title></title>
</head>
<body>
<!-- include js script -->
<script src="./build/my.js" ></script>
<!-- my script -->
<script>
var book = new Book();
alert(book.Name);
</script>
</body>
</html>
2)
Файл
package.json
{
"name": "my_typescript_project1",
"version": "1.0.0",
"description": "",
"main": "index.js",
"scripts": {
"MyBuild": "tsc"
},
"author": "",
"license": "ISC",
"devDependencies": {
"typescript": "^3.9.7"
}
}
3)
Файл
tsconfig.json
{
"compilerOptions": {
"module": "commonjs",
"target": "es6",
"lib": ["es6"],
"sourceMap": true, // true means that will be generating debug information(map file). And you can debug application with breakpoints.
"outDir": "./build"
},
"exclude": [
"node_modules"
]
}
4)
Файл
.vscode/launch.json
{
// Use IntelliSense to learn about possible attributes.
// Hover to view descriptions of existing attributes.
// For more information, visit: https://go.microsoft.com/fwlink/?linkid=830387
"version": "0.2.0",
"configurations": [
{
"type": "chrome",
"request": "launch",
"name": "Launch Chrome",
"url": "${workspaceFolder}/index.html"
}
]
}
5)
Файл
src/my.ts
class Book
{
public Name: string;
constructor()
{
this.Name = "Good book";
}
}
Как запустить пример локально у себя на компьютере?
Шаг 2.
Устанавливаем библиотеки
В
Visual Studio Code нажимаем на меню
Terminal →
New Terminal
Выполним:
Смотрите картинку:
 Объяснение:
В этом zip архиве нет
js библиотек.
Название и версии
js библиотек написаны в файле
package.json.
При выполнении в командной строке
npm install библиотеки с названием и версии из
package.json скачаются из интернета и установятся в папку
node_modules
Шаг 3.
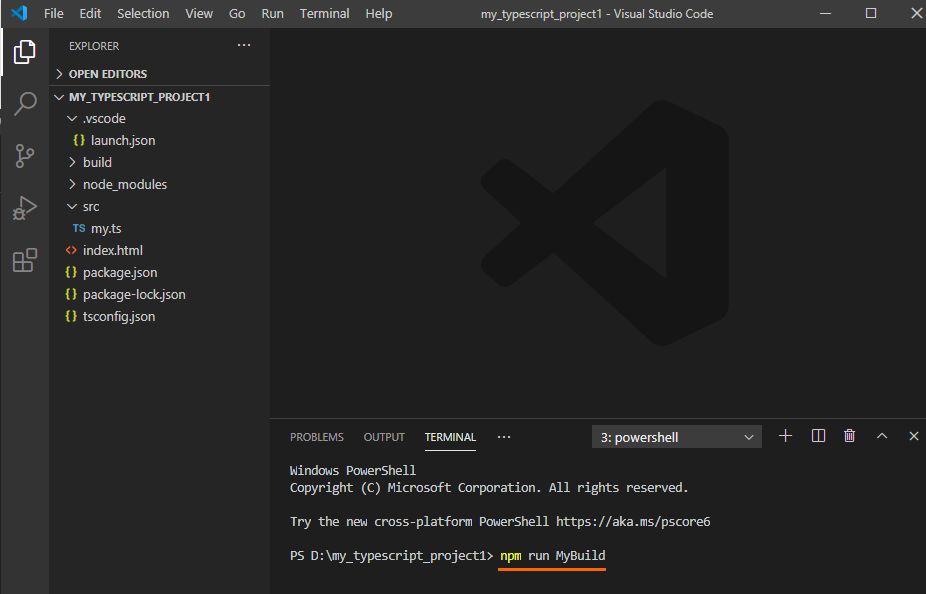
Компилируем проект
Выполним:
Смотрите картинку:
 Объяснение:
Команда
npm run MyBuild запускает скрипт
MyBuild.
Скрипт
MyBuild определен в файле
package.json.
Файл D:/my_typescript_project1/
package.json:
{
...
"scripts": {
"MyBuild": "tsc"
}
...
}
Скрипт
MyBuild запустит
tsc.
tsc это программа TypeScript которая конвертирует
ts файл в
js файл
Запуск
tsc без параметров означает что настройки будут браться из файла
tsconfig.json
Шаг 4.
Открываем страницу
В
Visual Studio Code нажимаем на меню
Run →
Start Debugging
Смотрите картинку:
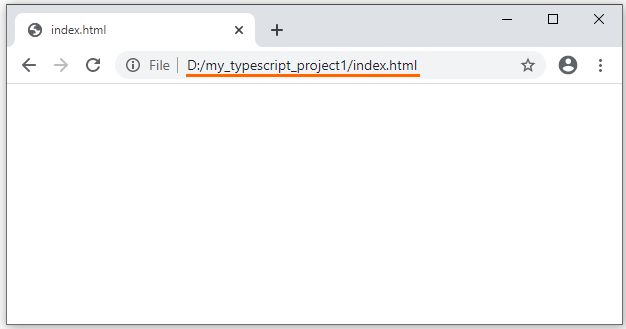
В браузере
Google Chrome откроется страница с таким адресом:
file:///D:/my_typescript_project1/index.html
 Объяснение:
Запускается
index.html
потому что файл настройки
.vscode/launch.json
{
"version": "0.2.0",
"configurations": [
{
"type": "chrome",
"request": "launch",
"name": "Launch Chrome",
"url": "${workspaceFolder}/index.html"
}
]}
создержит
"url": "${workspaceFolder}/index.html"
На заметку!
Если поменяли файл src/my.ts то нужно выполнить:
Шаг 3. (компилируем проект)
Шаг 4. (запускаем)


 Your feedback ... Comments ...